Aprons are “in” – Don’t be left out!
Whether you’re working in the kitchen, working on an art project, or just trying to *look* all crafty and productive, a good apron is a must have. It protects your clothes, is easily washable, and you can put it on over any outfit in seconds.
If you’ve got an old t-shirt that you don’t wear, hanging in a closet getting dusty, you might as well turn it into an apron. There are only six steps to follow, and each one is pretty simple. You could literally be done in two minutes. What have you got to lose?
Not convinced? Ask yourself this: What do these two people have in common?


That’s right! They’re not wearing aprons!
Now here’s you with an apron:


Okay? I think you get my drift… so let’s get started.
Materials: 1) Old T-shirt 2) Scissors
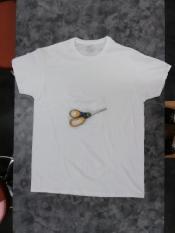
Here’s a photograph, in case you don’t know what an old t-shirt and scissors look like.
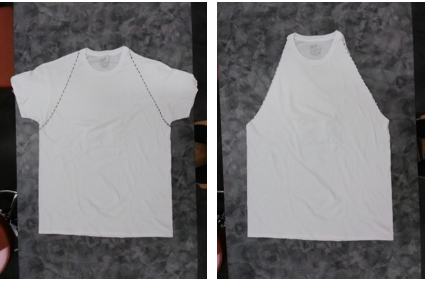
Step 1:
Cut a diagonal from just below the sleeve to the edge of the collar. (Leave the actual collar itself intact.) Repeat on the other side.
“Pro tip” from a guy who just learned it earlier this week:
Save the spare pieces of cloth you cut away to sew a pocket on your apron when it’s finished. Or use them to make a do-rag, or a scrunchie, or some other random thing.
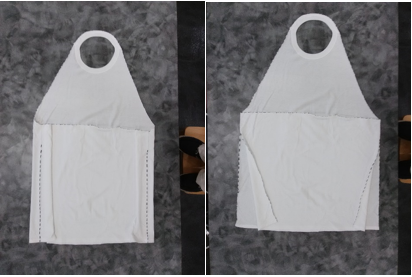
Step 2:
Flip the t-shirt over, so the back is facing up, then cut across the back from one armpit to the other. (This time, only cut the back of the shirt, not the front.)
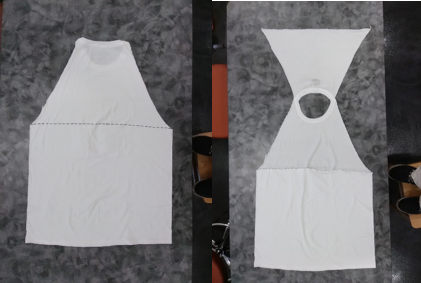
Step 3:
Cut around the collar and discard the extra cloth.
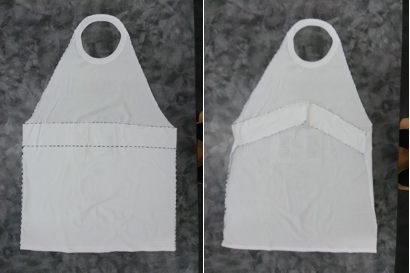
Step 4:
Cut along the side crease, starting from the bottom. Stop about 3 inches below the armpit. Repeat on the other side.
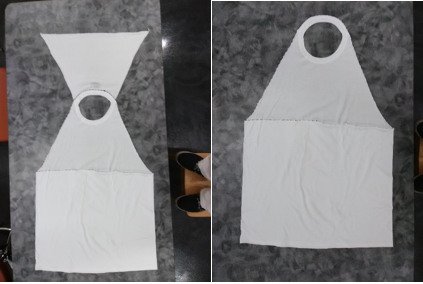
Step 5:
Cut across the lower back, leaving the 3 inch strip. Discard the extra cloth.
Step 6:
Finally, turn that 3 inch strip into two 1.5 inch apron ties. Cut along the shirt’s right side, from the bottom of the strip half way up. Cut all the way across the middle of the strip, from right to left. Then cut along the shirt’s left side, up from the middle to the top of the strip.
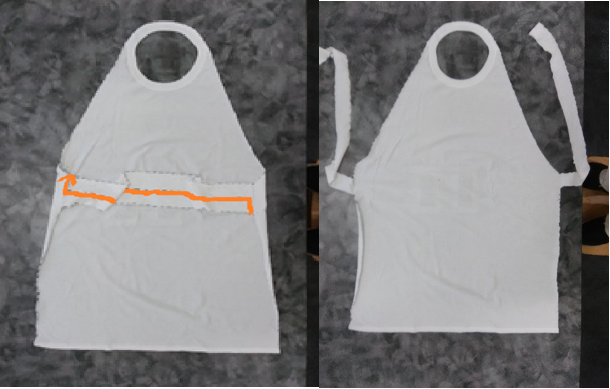
Style It!
With your trusty new apron, you’re now ready to dive into the stickiest of messes, while remaining at the height of fashion! Decorate it to suit your fine tastes. Add features if you’re a skilled seamster. Enjoy!

My manager, Ms. Kerry, rocking a chic apron ensemble at the Waldo Branch
If this blew your mind - but, like, in a good way – check out this cool book on DIY T-shirt crafts! Also the library has more crafting materials, and our Creativebug eSource.
Originally Posted by JishnuDasaF on November 9, 2020