
The world can be a tough place, but it doesn't have to be a stinky one. Stash and carry your favorite fragrances anywhere with handcrafted aromatherapy diffusers.
For this project, you will need just a few simple things: air-dry clay, a knife, a needle with a large eye, cord, a toothpick, and essential oil(s).
You may wish to use other small items to make impressions in the clay. If you don't plan to use all your clay at once, you might also want a plastic container or bag that seals so that your clay will remain moist and pliable.

After you open your clay, soften it with your hands and then take an amount about the size of a golf ball. Make it into a sort of rough cup, into which you will put 8 - 10 drops of essential oil(s). Then, pinch the top of the clay closed around the oil pool, and roll it into a ball. When rolling the clay into a ball, take your time so that the oil(s) will be distributed evenly within the clay.
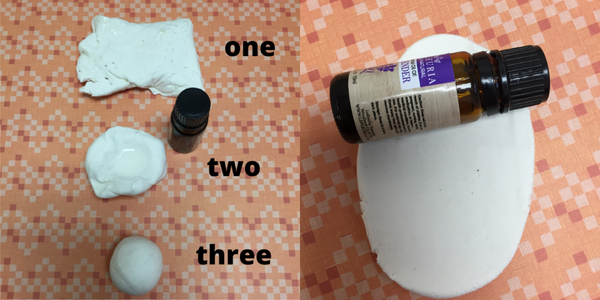
Once you have finished rolling the ball, lay it on your surface and flatten it with your hands. If your essential oil bottle is cylindrical, you can use it as a rolling pin to get a smooth surface.
Once you've rolled your clay into a flat shape about as thick as a smartphone, use the knife to cut it into any straight-edged shape you like. Trim and push the unused clay to the side for later use. If you want something round, you can use the open end of a glass or jar in the size you like. A favorite cookie cutter would also work.
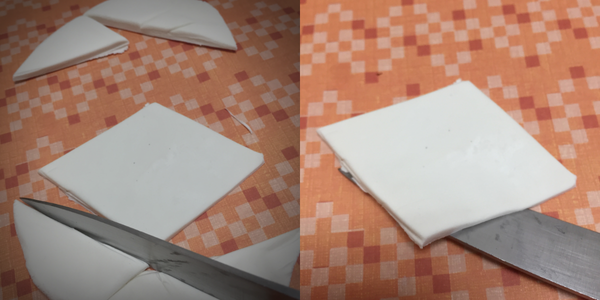
Gently slide the blade of the knife under the edge of the clay to lift it from your work surface. You want to do this before you embellish it because there is a chance that your design work will be damaged if the wet clay doesn't lift off smoothly.
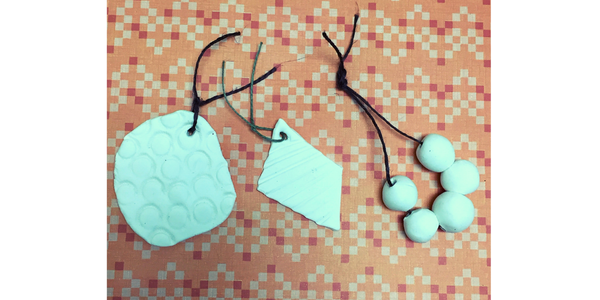
After you've shaped and trimmed your clay, you can either leave it plain or embellish it by gently pressing small objects into its surface. You can also use a toothpick to create the lines shown in the image below.
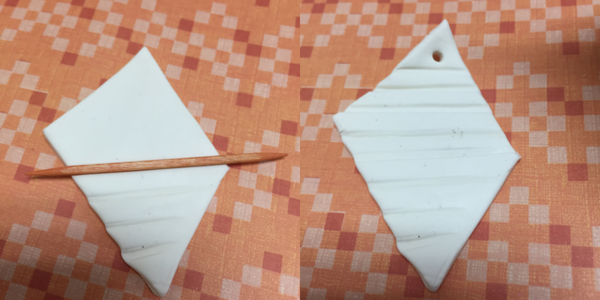
Then use your toothpick to create a hole near the edge of your diffuser.
Use your knife to gently lift the area near the hole from the work surface. Thread the needle with the cord, and then use it to pull the cord partway through the hole.
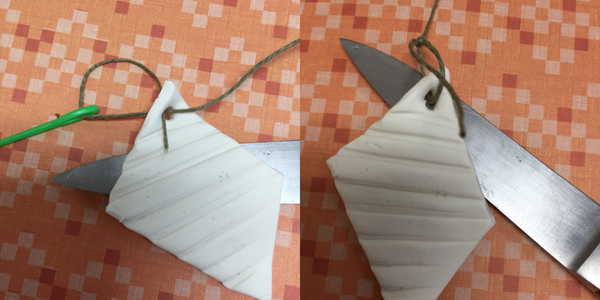
Hold one end of the cord while you pull the rest of it through the hole, and then tie both ends into a square knot near the edge of the clay. Leave at least 2" on each end so you can use them to attach your diffuser to other things.
Once you've tied your knot, gently remove the clay from your surface. You can put it back, but just make sure you don't have it pressed down. Let it rest and dry out for 48-72 hours, and it will be ready to use.
That's it. You're done. If you have leftover clay, you can use it to make jewelry, other things, or just more diffusers in other shapes, like these shown below.
If you enjoyed working with clay, you can get some great ideas for other projects at Creativebug. It's completely free with your Alachua County Library District library card. Learn more about aromatherapy with items in our catalog.

The Family Guide to Aromatherapy: A Safe Approach to Essential Oils for the Holistic Home by Erika Galentin
Mix up a happier home with aromatherapy recipes for the whole family. Full and busy households are a beautiful thing, but they can also create stress and chaos. The Family Guide to Aromatherapy is a complete, family-friendly reference for using essential oils at home to promote wellness and harmony. With safety at the forefront, this book teaches you how to use aromatherapy to benefit the whole family. Learn how to mix and properly dilute the right oils to help ease everything from acne and anxiety to indigestion and insomnia. The whole family can make blends to help with things like mood and confidence, and even make their own shampoo—with safe ingredients for all ages. The Family Guide to Aromatherapy offers:
- The real scoop-Learn the joy and benefits of essential oils, along with their honest limitations and potential risks.
- Aromatherapy for every life stage-Hundreds of recipes are sorted by age group, from prenatal to seniors.
- Safety first-Each chapter begins with watch-outs for the associated ages, and charts explaining which essential oils are safe, which to use in moderation, and which to avoid altogether.
- Handy references-You'll find pages to write notes, and a glossary of 30 common essential oils and their properties. Use aromatherapy to create a peaceful, pleasant, and safe environment for everyone.

Essential Oil Diffuser Recipes: 100+ of the Best Aromatherapy Blends for Your Home, Health, and Family by Pam Farley
Nourish your spirits naturally with the healing effects of essential oils. Used with a diffuser, aromatic essential oils can uplift your mood and safely add fragrance to your home without the toxic chemicals found in scented sprays and candles. This pocket guide describes the different types of diffusers available and explains why quality oils are crucial. This collection of more than 100 recipe blends includes combinations for immune support, mental clarity, mood enhancement, relaxation and sleep, romance, and stress relief.

Essential Oils: All-Natural Remedies and Recipes for Your Mind, Body, and Home by Susan Curtis
An instructional reference guide to essential oils and aromatherapy from the experts at Neal's Yard Remedies, a trusted source for natural, nontoxic health and beauty products.
Learn how to harness the healing powers of essential oils for treating maladies and improving mental and physical well-being so you feel great in every way. Use homeopathic alternatives to treat everyday health and wellness concerns, including:
• Acne
• PMS
• Insomnia
• Indigestion
• Soothing inflammation
• Rebalancing energy
• Enhancing focus
• Releasing stress
Whether you live an all-natural lifestyle or you are just beginning to use alternative methods to eliminate synthetic chemicals from your everyday products, Essential Oils is packed with authoritative information to answer your questions.
This visual guide features comprehensive profiles of 88 essential oils, stunning full-color photographs, and helpful guidance for using, blending, and storing. Understand what essential oils are, where they come from, and how they benefit the body. Choose from 33 focused recipes to rejuvenate your total person. Learn classic remedies for the most common emotional and physical conditions.
An illustrated A-to-Z reference section helps identify the most useful oils, plus shares tips on application methods and massage techniques. Up-to-date safety recommendations help you learn how to use them for maximum benefit.
Essential Oils can help you improve your overall well-being and start you on the path to a more natural you.
Also, if you are interested in more than just making things smell nice, did you know you can get a master's degree in aromatherapy from at least two accredited universities? They are the American College of Healthcare Sciences and the Maharishi International University, accredited by the Distance Education Accrediting Commission (DEAC) and the Higher Learning Commission (HLC), respectively.
Also, there are at least two professional associations for aromatherapists. One is the National Association for Holistic Aromatherapy (NAHA) and the other is the International Federation of Professional Aromatherapists (IPFA). So you can have fun learning about and playing with essential oils, or you can have fun learning about and earning a living with essential oils. Either way, have fun and keep learning.